For many people, taking a photo on iPhone means fully trusting Apple’s automatic processing. The camera system would analyze the scene, adjust colors, lighting, noise reduction, and contrast, delivering an image ready to share.
But there’s another possibility for those who want more control over the final result: shooting in RAW.
A RAW photo on iPhone is an image that preserves the original data captured by the camera sensor, offering much more freedom to edit exposure, colors, and details.
On iPhone, this technology got its own version called Apple ProRAW, which combines the traditional raw file with Apple’s computational photography features.
But after all, what is a RAW photo on iPhone? What’s the difference from a regular JPEG or HEIF photo? Is it worth leaving this format on all the time? (SPOILER: no)
Let’s explain it all in this complete guide.
What is a RAW photo?
A RAW photo is an image that keeps the original data captured by the camera sensor, without applying all the automatic changes that normally happen before a photo reaches your gallery.
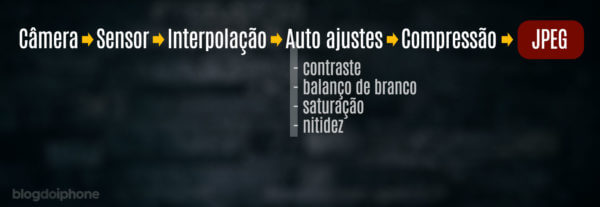
When you take a regular photo on iPhone, the system automatically performs several processes:
- adjusts exposure;
- corrects colors;
- applies noise reduction;
- enhances details;
- combines several images into one using features like HDR.
This “process” that the JPEG file goes through, besides automatically applying some image adjustments, also compresses the file so it doesn’t take up an excessive amount of space on the device.
After all, if it’s already hard to keep free space on your iPhone today, imagine what it would be like if every photo you took took up more than 20 MB.
The result is a beautiful photo that’s ready to use.
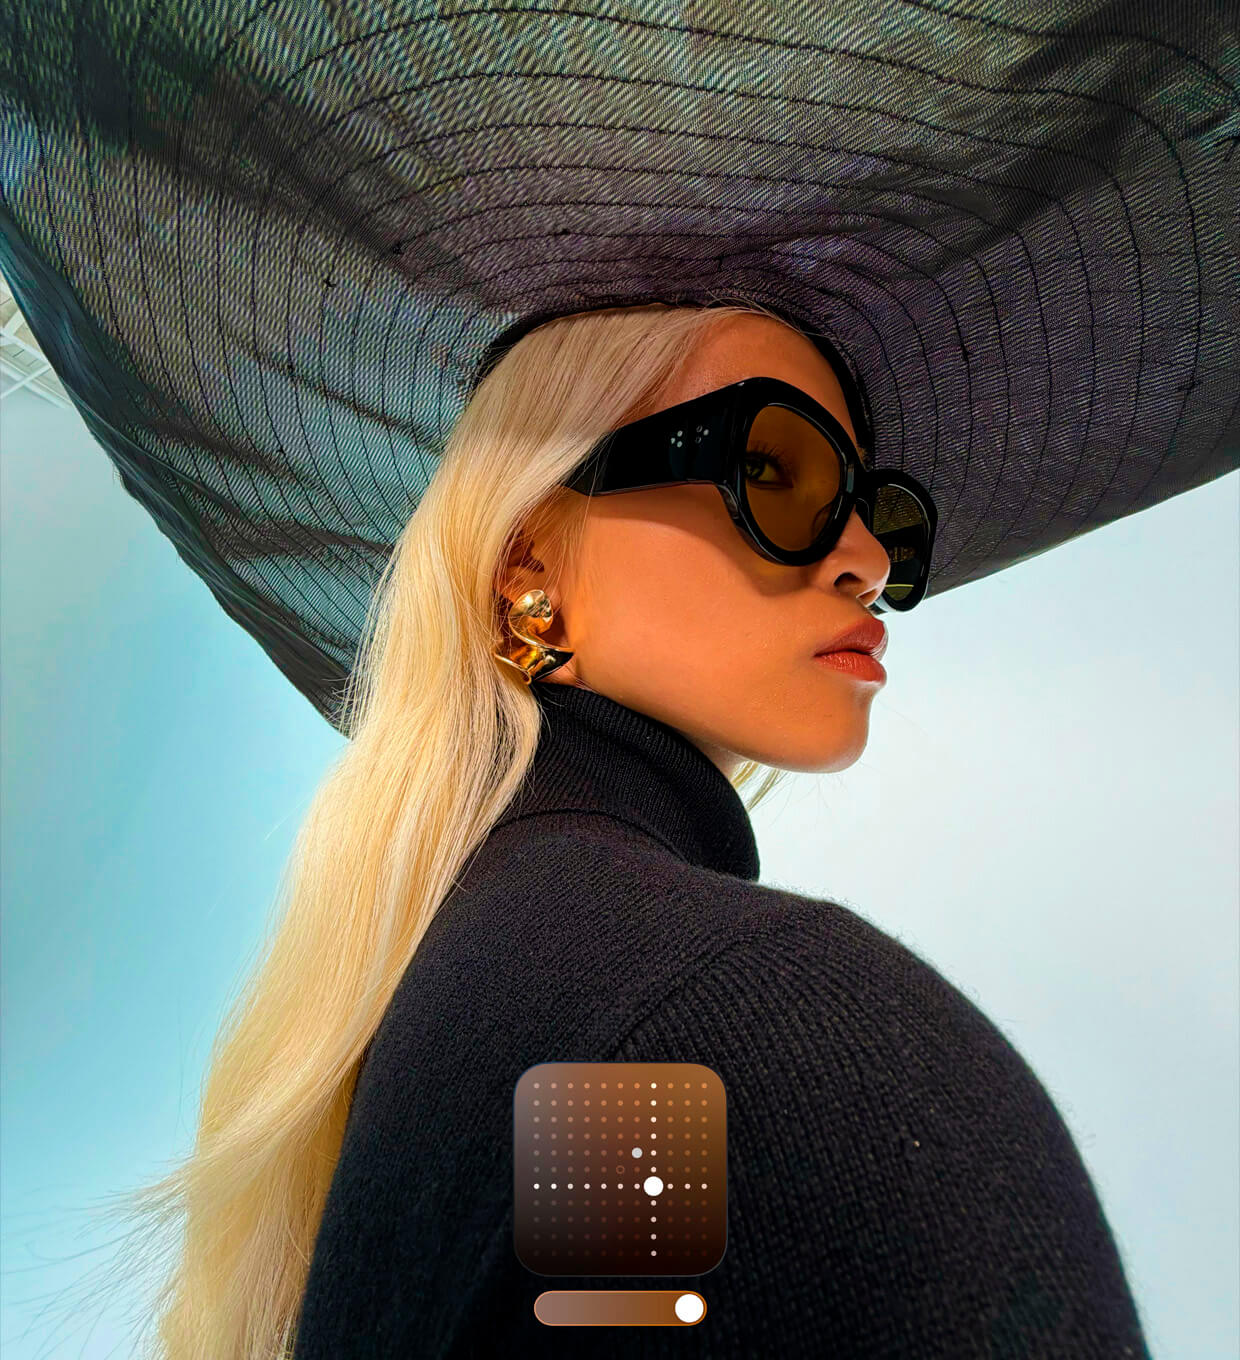
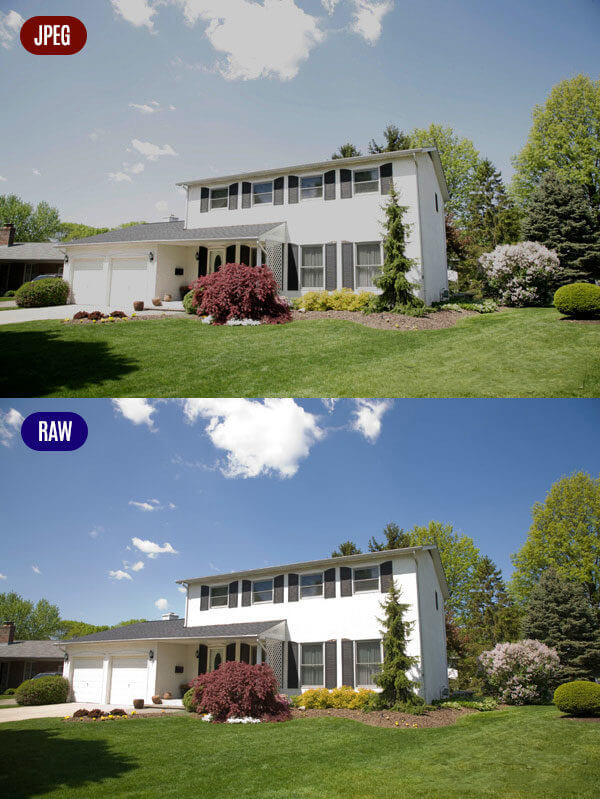
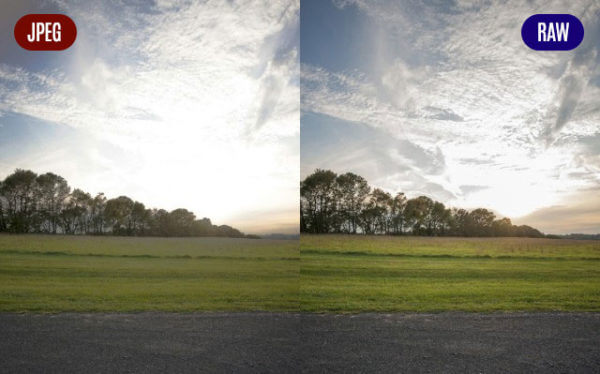
The problem is that many of these decisions are made by the iPhone itself. If later you want to recover detail in a very bright area or increase the exposure in a dark region, you’ll have less information available.
In the RAW file, that information remains preserved, offering much more freedom during editing.
The RAW format is, as the name itself says, a raw file, simply captured by the sensor and without undergoing any manipulation in the adjustments.
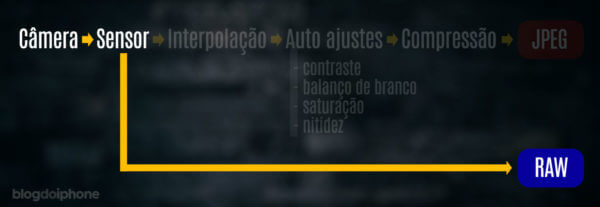
It’s as if a regular photo were a meal already prepared by the chef, while a RAW photo is receiving all the ingredients separately so you can decide how to plate the dish.
Many call the RAW format the “digital negative”, referencing the old developed film from analog movies.
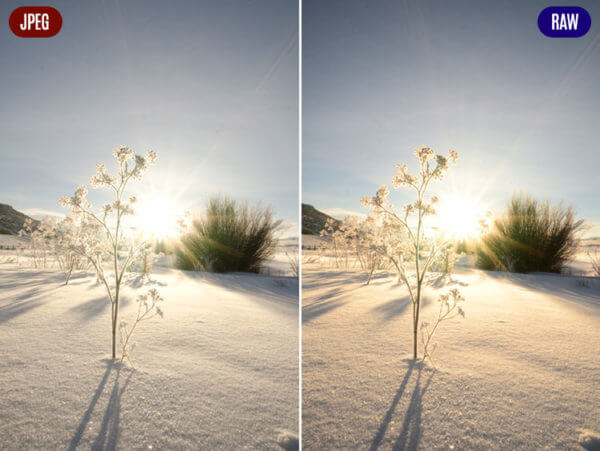
RAW gives photographers much more freedom to change the nuances of a photo, such as background clarity, shadows, overexposed areas, and saturation adjustments.
With this, an image originally captured in RAW format can turn (when well edited) into a much more beautiful and professional image.
What’s the difference between RAW and Apple ProRAW?
Apple ProRAW is the RAW format developed by Apple for compatible iPhone models.
It’s not simply a traditional RAW file. Apple combined sensor data capture with computational photography features, such as:
- Smart HDR;
- Deep Fusion;
- exposure adjustments;
- depth information;
- tone mapping.
The result is an image that keeps the editing flexibility of a RAW file, while taking advantage of part of the iPhone’s processing intelligence.
The files are saved in DNG format, a standard created by Adobe that’s compatible with several professional editing programs.
Which iPhones take RAW photos?
Apple ProRAW is only available on the most recent Pro and Pro Max models.
Currently, compatible models include:
- iPhone 12 Pro and iPhone 12 Pro Max;
- iPhone 13 Pro and iPhone 13 Pro Max;
- iPhone 14 Pro and iPhone 14 Pro Max;
- iPhone 15 Pro and iPhone 15 Pro Max;
- iPhone 16 Pro and iPhone 16 Pro Max;
- iPhone 17 Pro, iPhone 17 Pro Max, and iPhone Air;
- compatible Pro models released later by Apple.
Standard iPhone models don’t have Apple ProRAW built into the Camera app.
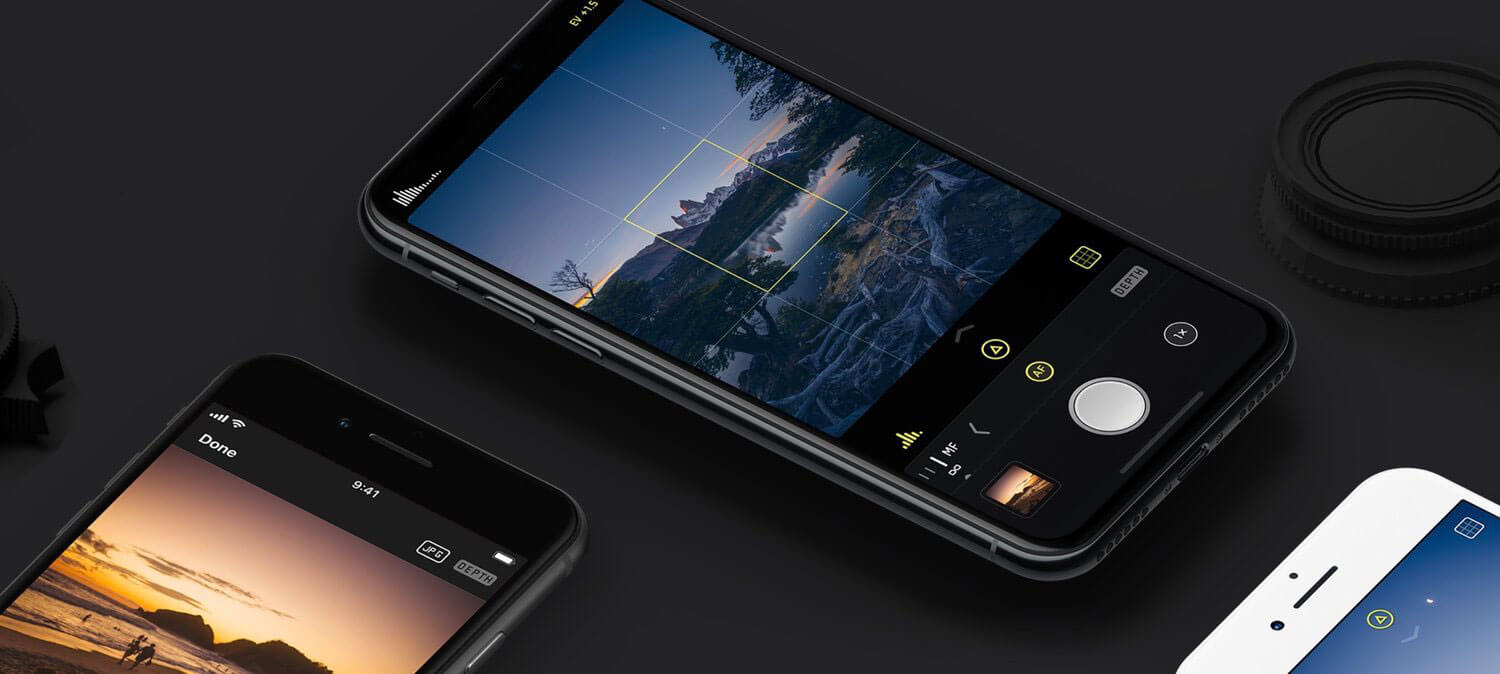
However, some App Store apps can capture RAW photos using other methods.
How to take RAW photos using Apple ProRAW on iPhone
By default, the iPhone keeps ProRAW turned off because the files take up a lot of space.
To enable the feature:
- Open the Settings app.
- Tap Camera.
- Go into Formats.
- Turn on Apple ProRAW.
After that, the RAW button will appear inside the Camera app whenever it’s available.
You can choose when you want to shoot in this format, without having to leave every image in RAW.
After turning on Apple ProRAW, you can shoot in RAW directly through the iPhone’s Camera app. The process is simple:
- Open the iPhone camera.
- Tap the RAW button at the top of the screen.
- Take the photo normally.
When RAW is turned on, the iPhone will save an image with much more information for editing.
If the RAW button is off, the camera will keep working normally, saving photos in the standard format.
What’s the difference between RAW, ProRAW, JPEG, and HEIF?
This is one of the biggest questions for anyone starting to research iPhone photography.
| Format | Characteristic | Best use |
|---|---|---|
| JPEG | Processed and compressed photo | Quick sharing |
| HEIF | Modern format used by iPhone, with better compression | Everyday use |
| RAW | File with original sensor data | Professional editing |
| Apple ProRAW | RAW with Apple’s computational photography features | Advanced photography on iPhone |
In practice, HEIF and JPEG are better for most people.
RAW and ProRAW make sense when you intend to edit the image afterward.
RAW or HEIF: which is better on iPhone?
It depends on the goal.
For everyday photos, trips, family, and social media, HEIF is usually the best choice.
It delivers excellent quality, takes up less space, and already comes optimized by the iPhone’s processing.
RAW is recommended when you want to make more aggressive edits.
For example:
- recovering detail in shadows;
- fixing a wrong exposure;
- completely changing the color balance;
- working on a photo for printing.
How much space does a RAW photo take up on iPhone?
This is one of the main reasons not to leave RAW turned on all the time.
A regular iPhone photo can take up a few megabytes.
An Apple ProRAW image, on the other hand, can easily go over 20 MB, depending on the resolution and settings used.
On models that shoot at 48 megapixels, the size can be even bigger.
Because of this, anyone who uses RAW frequently needs to keep an eye on the device’s internal storage or the space available on iCloud.
| Format | Average size |
|---|---|
| HEIF | 2–5 MB |
| JPEG | 3–8 MB |
| Apple ProRAW 12 MP | 20–30 MB |
| Apple ProRAW 48 MP | 50–75 MB |
Is it worth taking every photo in RAW on iPhone?
In most cases, no.
Apple’s automatic processing is extremely advanced and can deliver excellent results without any intervention from the user.
Leaving RAW turned on for every photo can bring some disadvantages:
- it takes up a lot more space;
- it requires later editing;
- the files take longer to upload;
- quick sharing becomes less practical.
Ideally, use ProRAW when you know that image deserves special treatment.
Landscape, architecture, travel, product photos, or tricky lighting situations are great examples.
When should you use Apple ProRAW?
ProRAW makes the most sense in situations like:
➜ High-contrast photos
When there’s a big difference between light and dark areas, RAW lets you recover more detail.
➜ Photos for professional editing
If you plan to work on the image in Lightroom, Photoshop, or another editor, RAW offers many more possibilities.
➜ Important photos
A special trip, a unique landscape, or an image that will be printed can benefit from the format.
When should you not use RAW?
For quick everyday photos, it’s probably not worth it.
Examples:
- food photos to send on WhatsApp;
- casual snapshots;
- photos for social media;
- images you don’t plan to edit.
In these cases, the iPhone’s automatic processing already delivers an excellent result.
What app should you use to edit RAW photos on iPhone?
Apple’s Photos app can make basic adjustments to RAW files.
But anyone wanting more control can use specialized apps, such as:
- Adobe Lightroom;
- Capture One;
- Darkroom;
- Pixelmator.
These apps let you adjust exposure, shadows, highlights, colors, and several other elements of the image.
Does RAW make the iPhone camera better?
No.
This is a common question.
Shooting in RAW doesn’t increase the sensor’s quality, doesn’t improve the lens, and doesn’t make the iPhone automatically capture more detail.
What it does is store more information from the photo so you can work with it better during editing.
The final quality will depend on the photographer, the lighting, and the treatment applied afterward.
FAQ about RAW photos on iPhone
🟡 What is a RAW photo on iPhone?
A RAW photo on iPhone is an image that keeps the original data captured by the camera sensor, without applying all the automatic processing done by the system. This allows greater control during editing, such as adjustments to exposure, colors, shadows, and details.
🟡 What’s the advantage of shooting in RAW on iPhone?
The main advantage of shooting in RAW is having more information available for editing, allowing you to recover detail in bright or dark areas and make more precise adjustments to images.
🟡 Which iPhones have RAW?
Apple ProRAW is available on compatible Pro and Pro Max models, starting with the iPhone 12 Pro and iPhone 12 Pro Max. Pro models from subsequent generations also support the feature.
🟡 How do you use RAW on iPhone?
To use RAW on iPhone, open Settings, tap Camera, go into Formats, and turn on Apple ProRAW. Then open the Camera app and tap the RAW button before taking the photo.
🟡 How do you turn off RAW mode on iPhone?
To turn off RAW on iPhone, open the Camera app and tap the RAW button to disable capturing in that format. You can also adjust the feature’s preferences in the camera settings.
🟡 What are HEIF and RAW on iPhone?
HEIF is the standard format the iPhone uses to store photos with good quality and smaller file size. RAW and Apple ProRAW preserve more information from the capture and are recommended for more advanced editing.
Conclusion: is RAW on iPhone worth it?
Apple ProRAW is a powerful tool, but it wasn’t created to completely replace the iPhone’s traditional photo format.
RAW’s big advantage lies in control. It lets you turn a good photo into a much better image during editing.
For most people, HEIF remains the smarter everyday choice. But for anyone who enjoys photography, wants to learn editing, or intends to produce professional-quality images, shooting in RAW on iPhone opens up a whole new level of possibilities.
The trick is knowing when to use each format.
The iPhone already does an excellent job on its own, but ProRAW puts more power in the hands of those who want to go further. 😉👍